Update: This is one of the first tutorial about using letsencrypt in shared hosting when letsencrypt first came out. However, its 2018, and letsencrypt is now certbot. This tutorial might be outdated. The good news is, you can try out the Lets Encrypt Certificate Generator instead!
The gist here is to generate the Let’s Encrypt certificate locally and install it to your server using cPanel. This is the exact steps I used for this domain.
Things Needed
- An OS to install and run the Let’s Encrypt client. In this example I will use Ubuntu 14.04 VM on Windows.
- cPanel access. Your cPanel should allow SSL certificates to be installed manually.
- File upload access to the server. I used SFTP.
Installing the Let’s Encrypt Client
- Fire up the terminal and update Ubuntu.
sudo apt-get updateThen install letsenceypt client using git:
git clone https://github.com/letsencrypt/letsencryptNote: If you don’t have git installed, type:sudo apt-get install git - Once its done, go to the directory where the client is installed. For me its: cd letsencrypt
Generating the Lets Encrypt Certificate
- Inside the letsencrypt directory, type:
./letsencrypt-auto certonly -a manual --rsa-key-size 4096 -d kosinix.com -d www.kosinix.comNote: Make sure to change kosinix.com to the domain of your website.
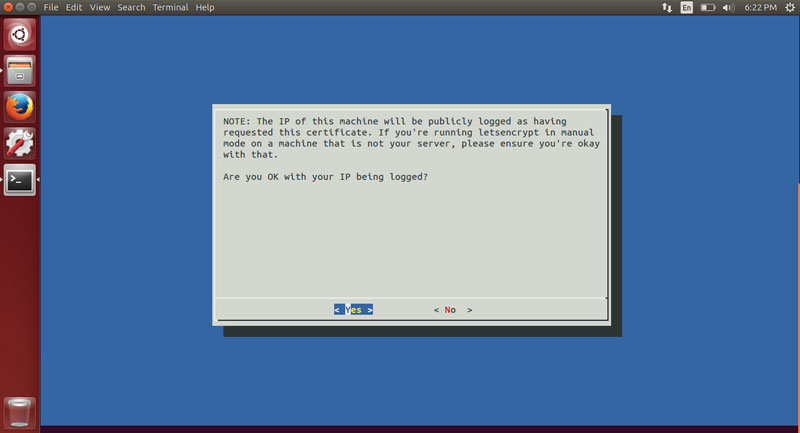
- The client will prompt you if its OK to log your IP. Choose Yes.
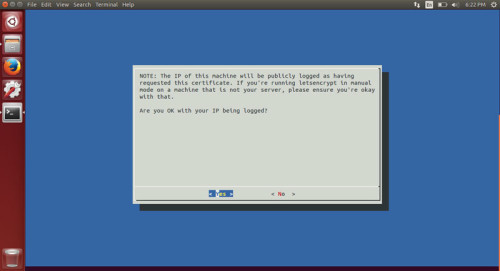
Confirm IP logging - Now, whatever happens, do not press anything yet or you will have to restart the generation process!
Confirming Domain Ownership
Notice that below the prompt is an instruction on how to confirm ownership of your domain: Make sure your web server displays the following content at http://kosinix.com/.well-known/acme-challenge/xuJ_RPQbkGG356A7WRya9JiJ59Lj1dWjS7OG40oQMOM before continuing: xuJ_RPQbkGG356A7WRya9JiJ59Lj1dWjS7OG40oQMOM.oUqbjO_-ZMUbmaC1JeWUVUrSB0ulSIDoHekYe_jffyk

- Connect to your server and create the following directory inside your server’s public directory: .well-known/acme-challenge/
- Inside it create a text file named xuJ_RPQbkGG356A7WRya9JiJ59Lj1dWjS7OG40oQMOM that contains the string xuJ_RPQbkGG356A7WRya9JiJ59Lj1dWjS7OG40oQMOM.oUqbjO_-ZMUbmaC1JeWUVUrSB0ulSIDoHekYe_jffyk
Note: The strings will be different for you.
- Once you are done, go back to the terminal and press the enter. LE will generate one more confirmation. Just repeat step number 6.
Installing the Certificate in cPanel

- Type:
sudo nautilus - Using the file browser as root, navigate to
/etc/letsencrypt/live/kosinix.com - Login to your cPanel. Copy and paste the SSL info from these files into the cPanel SSL panel:
Certificate (CRT) is cert.pem
Private Key is privkey.pem
Certificate Authority Bundle: (CABUNDLE) or CA is chain.pem
I used gedit to open and copy the contents of the .pem files.
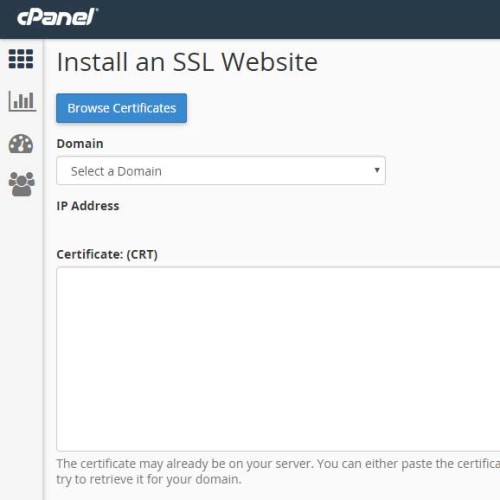
Installing the certificate in cPanel Note: You can also use the
catcommand to view text files in the terminal. Eg.cat cert.pem

Bonus: Redirect all request to https
Add this in your .htaccess:
# BEGIN Force SSL
# This should be the first rule before other rules
<IfModule mod_rewrite.c>
    RewriteEngine On

    RewriteCond %{HTTPS} !=on
    RewriteRule ^/?(.*) https://%{SERVER_NAME}/$1 [R,L]
</IfModule>
# END Force SSL
Pingback: Let’s Encrypt – Alex Caro
Ah i just knew that we can generate letsencrypt on local and upload cert to our shared hosting … i’m gonna need this 🙂
Thanks
Let’s encrypt certificates expires in 90 days. How could we auto renew the cert with this method and put it on the server automatically?
do you need to point your domain to your ubuntu or not
I’ve successfully created a certificate..but my host only supports private key with is of 2048bit… mine seems to be larger than that, what should I do?
Great Tutorial, But the certificate is valid for only 3 months. How to renew it automatically? or should I renew it manually every 3 month?
Hello thank you for the tutorial, can you please explain the sep 5, 6 and 7?
Awesome tutorial ! Thank you !
Thanks for this article, it helped me out. 🙂 In the end I’ve been using the “webroot” plugin instead of “manual”, the only problem was that it wouldn’t wait until I copied the files to the actual webserver. I’ve ended up forking certbot and adding a “–webroot-delay-auth” option.
https://github.com/certbot/certbot/pull/3236
Also, I’ve looked into a method of running certbot without elevated privileges:
https://www.niklasrosenstein.com/2016/07/using-letsencrypt-without-sudo/
Thanks again,
Niklas
Amigo, me acabas de hacer muy muy felíz, está excelente tu POST, de verdad 1000000000 gracias
Hello, thank you for the tutorial and I was wondering about the renewal process?
Thanks man for the tutorial. it has been realy helpful. I have a startup dealing with internet security solutions. I would like to poke your mind on one or two things
Good article and tutorial… please explain how to renew after 90 days, as I can see your site Certificate is no longer supported, and browse give alert before entering your website.
Thank you for the tutorial. Let’s Encrypt is great and cPanel has a handy plugin to install lets encrypt ssl certificates. For those hosting providers who use custom control panels, and has limited ssh access there is a way to use ACME php client and composer to install ssl certificate. We even created a tutorial on this topic, showing how to install lets encrypt on shared hosting: http://www.hostinger.com/tutorials/ssl/how-to-install-free-ssl-from-lets-encypt-on-shared-hosting
This is very useful but seems that without root access there is not much you can do?
This is a list of hosting that has the cPanel letsencrypt plugin ready installed:
http://www.webhostwhat.com/lets-encrypt-shared-free-ssl-hosting-list-of-companies/
Regards,
Tim
Thanks a ton for the step-by-step tutorial. This helps !
I was wondering if this would work and it does.
Nowadays there is a LetsEncrypt cPanel plugin that makes this easier and can autoupdate certificates. But if you are not lucky to have that installed (like me) you can use this method to renew each 2-3 months manually.
I have used https://acme.sh instead of LE’s script (I like that better). Used the webroot mode.
I have then disabled acme’s cron job and installed the certs from cPanel’s.
There may be a way to install the certificate from cPanel`s ssh jailbox, I will investigate into that.
My cPanel was a bit different. I had to create a private key, create a certificate and then install those to my domain. Glad it works but I am already looking for another company that has LE builtin.
Dude, you rock!
Thank you so much sir.
for namecheap shared hosting you can use this to automate it
https://www.juliogonzalez.es/lets-encrypt-ssl-certificates-at-cpanel-without-native-support-for-example-at-namecheap/352
Nico!!
Thank you very much :):