
So you have created your first droplet on DO (Digital Ocean). Here’s a guide on how to connect to it if you are on Windows.
Things Needed
- Digital Ocean Droplet Info. You need the IP address, username, and password. You will receive an email containing this info when you create a droplet.
- PuTTY. Download is here at the time of this writing: https://www.chiark.greenend.org.uk/~sgtatham/putty/latest.html I prefer to use the zipped files instead of the installer for portability. If you are on the same boat as me, choose putty.zip 64-bit.
Generate SSH Keys
SSH keys are composed of a public and private key. The public key will be uploaded to DO. In order to generate the keys, we will use the PuTTY Key Generator.
- Assuming you have extracted putty.zip, open
PUTTYGEN.EXE.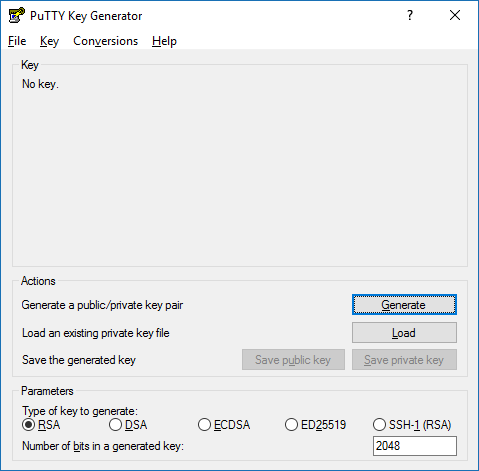
Generate the keys with these settings. - Click the “Generate” button. Then move your mouse to generate some randomness.
- After its done, copy the contents under the “Public key for pasting in Open SSH authorised_keys file:”.
Note: For some reason, DO won’t accept the public key saved in the text file generated by the “Save public key” button. The one generated by the dialog works fine.
- Go to your DO account. Under Profile > Security > Add SSH, paste the contents of your public key and give it a name.
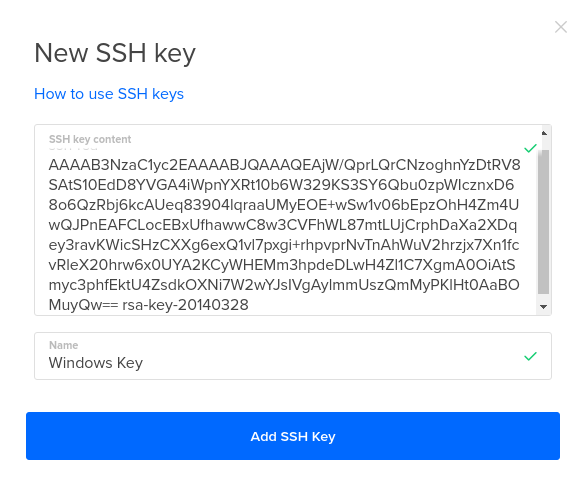
Paste it like its hot. - Back in PuTTY gen, click the “Save private key” button. Choose your location and save the private key as a .ppk file. PuTTY needs the private key to connect to DO.
Connecting to DO
- Run
PUTTY.EXEby double-clicking on it, which will start the program and take you to the configuration screen. - Set-up the SSH connection in putty, ensure that the following settings are set:
- Host Name (or IP address): Enter your server’s IP address here
- Port: 22 (default)
- Connection Type: SSH (default)
- On the left side category, go to Connection > SSH > Auth. Under the “Private key file for authentication:”, click the Browse button. Choose the private key (.ppk) file you saved earlier.
- Now you’re ready to connect. Double-click on the session name, and accept the security alert (this will only appear the first time you connect to a server).
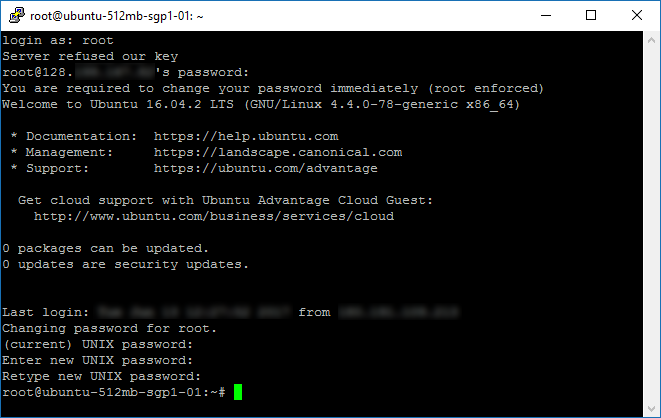
- Type your username. Eg.
root. - Copy paste the password from the email. To paste it in PuTTY, right-click once on the terminal and hit enter. Upon success, you will be prompted to change your password. Just follow the instructions.
That’s it. You now have root access to your server via the PuTTY terminal.
Bonus: Copy/Pasting in PuTTY
Copy pasting in putty is different from Windows. To copy a text, simply highlight it with your mouse (do not press CTRL+V). Then to paste, right click with the mouse button once.
No Comments